Saturday, October 31, 2020

Before and After: Halloween 2020

 That time of year again! Ghosts, witches, and zombies are out and about scaring up treats. 

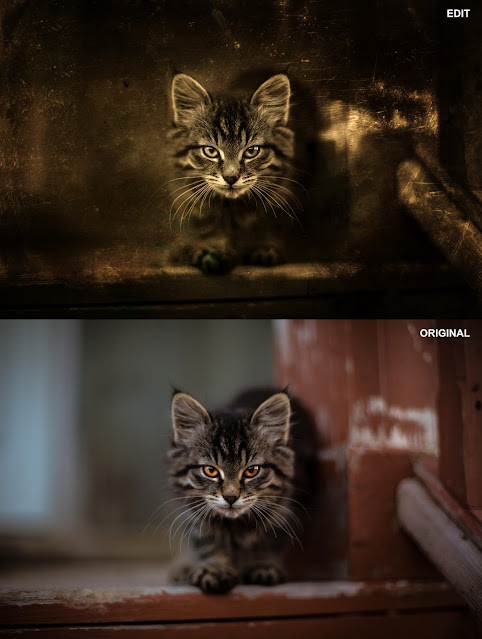
So here is a few scary edits I have done using photos that I found on the stock website Unsplash using applications like Affinity Photo and Luminar 3.

#beforeandafter #photoediting #photoeditor #affinityphoto #luminar3 #halloween

Original photo by Gabby H (Pexels

Original photo by Colton Sturgeon (Unsplash)

Original photo by 42 North (Unsplash)


Wednesday, September 23, 2020

Photo Art: Old Gas Station

Once again, I dive outside my comfort zone by trying my hand with art. Using a photo by Jakob Owens that I found on stock website Unsplash, I used Corel Painter 2020 and tried my hand in creating an artwork using two brushes, one was a pencil brush and the other was a water paint brush, then layer them on top of each other. What do you think?!

You can find the original photo here:

And you can find more of Jakob Owens photos here:

https://unsplash.com/@jakobowens1

#photoart #art #digitalpainting #corelpainter #unsplash


FINAL art using Corel painter


Original photo by Jakob Owens

Thursday, September 10, 2020

Before and After: LUTs House

 Did you know that you can use LUTs in Affinity Photo?!

LUTs (Look Up Tables) can be used in both photo editors like Adobe Photoshop and video editors like Premiere Pro. You can find some both free and pay on the web. I used a LUTs I found from RocketStock on this photo shot by Taylor Simpson and can be found on the free stock site Unsplash. Afterwards, I added a vignette and a field blur to finish the look.

#beforeandafter #photoediting #LUTs

After editing.

Before editing


Monday, August 31, 2020

Before and After: Tobias Bjørkli Norway

 Since I have not been out taking photos these days, I thought I take a photo from the stock website Pexels to do a before and after. This photo was taken by Tobias Bjørkli and is available for free from Pexels. For this photo, I used Affinity Photo to do all the editing starting with a simple Black and White adjustment layer and setting the blend mode to Lighten. Then I applied a Recolor adjustment layer to add the sepia color and set the blend mode to Color. Next, a Curves adjustment layer to add some contrast and finally a Brightness/Contrast adjustment layer to brighten the sky. 

I highly recommend Pexels if you are looking for free stock photos for your design projects.

#beforeandafter #photoediting #pexels #affinityphoto

After editing in Affinity Photo.


Before editing in Affinity Photo.

Wednesday, August 26, 2020

Before and After: Walk on Campus

 This summer I finally got out a little between all the crazy things going on with the pandemic and all. And while I have not used my Canon 5D Mark III for some time, I did use my old iPhone 6s Plus while I took a short walk around the Kenyon College campus. I love the stone buildings on the campus which is a mess with all the construction they are doing.

So, I thought I share one shot I took of Peirce Hall and Dempsey Hall. The photo was edited using Affinity Photo.


#beforeandafter #photoediting #affinityphoto #kenyoncollege

After editing in Affinity Photo.
Before editing in Affinity Photo.

Thursday, August 6, 2020

Before and After: Dog Water Fountain

Another shot from the new dog water fountain with a closeup of one of the dog statues. Shot with my Canon 5D Mark III and edited only in Affinity Photo.

Editing:
I started the editing my opening the RAW file into Affinity Photo's Develop Persona. After developing the photo, I moved to Affinity Photo's Photo Persona to do further editing starting with applying a LUTs named "Django" by RocketStock that I found on the internet. Next, I added a Lens Filter adjustment to warm up the photo follow by a Shadows/Highlight adjustment to open up the shadows some. Then I used Curves adjustment to brighten the photo. Added a Split Toning adjustment to the dog and a Exposure adjustment to add a vignette to finish it off.

#beforeandafter #photoediting #affinityphoto
After editing in Affinity Photo.

Before editing in Affinity Photo.


Monday, August 3, 2020

Before and After: Water Dog

So our city has a new dog water fountain downtown and last weekend I finally got around to checking it out. It is nice but the fountain has all these dog statues, I am more of a cat person. Okay, there was one cat statue, but it was okay. Well, here is one photo I took with my Canon 5D Mark III with a Canon 24-70mm lens. Shot in RAW format then processed with Affinity Photo, yes Affinity Photo can process RAW files. After processing, photo was exported out and then the effects were applied in Luminar 3 for the final results. I have not open Luminar 3 in a long time and have not decided if I will upgrade to Luminar 4. At this time, I have not upgraded Luminar or ON1 Photo Raw, just have not had any extra $$$ laying around.

#beforeandafter #photoediting #Luminar3

After editing.

Before editing.