Showing posts with label photo editing. Show all posts

Saturday, October 31, 2020

Before and After: Halloween 2020

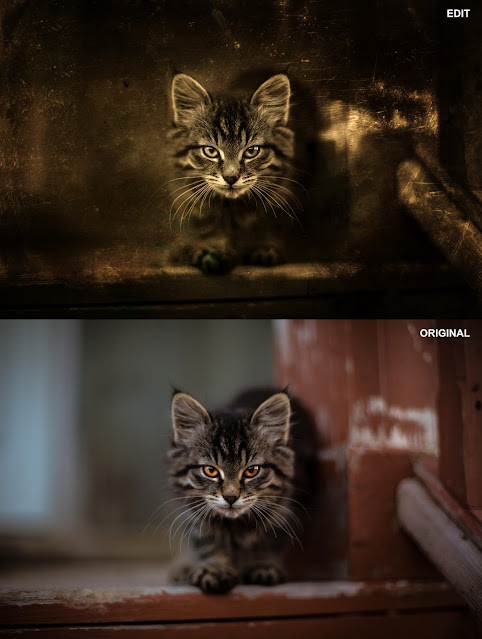
 That time of year again! Ghosts, witches, and zombies are out and about scaring up treats. 

So here is a few scary edits I have done using photos that I found on the stock website Unsplash using applications like Affinity Photo and Luminar 3.

#beforeandafter #photoediting #photoeditor #affinityphoto #luminar3 #halloween

Original photo by Gabby H (Pexels

Original photo by Colton Sturgeon (Unsplash)

Original photo by 42 North (Unsplash)


Thursday, September 10, 2020

Before and After: LUTs House

 Did you know that you can use LUTs in Affinity Photo?!

LUTs (Look Up Tables) can be used in both photo editors like Adobe Photoshop and video editors like Premiere Pro. You can find some both free and pay on the web. I used a LUTs I found from RocketStock on this photo shot by Taylor Simpson and can be found on the free stock site Unsplash. Afterwards, I added a vignette and a field blur to finish the look.

#beforeandafter #photoediting #LUTs

After editing.

Before editing


Wednesday, August 26, 2020

Before and After: Walk on Campus

 This summer I finally got out a little between all the crazy things going on with the pandemic and all. And while I have not used my Canon 5D Mark III for some time, I did use my old iPhone 6s Plus while I took a short walk around the Kenyon College campus. I love the stone buildings on the campus which is a mess with all the construction they are doing.

So, I thought I share one shot I took of Peirce Hall and Dempsey Hall. The photo was edited using Affinity Photo.


#beforeandafter #photoediting #affinityphoto #kenyoncollege

After editing in Affinity Photo.
Before editing in Affinity Photo.

Thursday, August 6, 2020

Before and After: Dog Water Fountain

Another shot from the new dog water fountain with a closeup of one of the dog statues. Shot with my Canon 5D Mark III and edited only in Affinity Photo.

Editing:
I started the editing my opening the RAW file into Affinity Photo's Develop Persona. After developing the photo, I moved to Affinity Photo's Photo Persona to do further editing starting with applying a LUTs named "Django" by RocketStock that I found on the internet. Next, I added a Lens Filter adjustment to warm up the photo follow by a Shadows/Highlight adjustment to open up the shadows some. Then I used Curves adjustment to brighten the photo. Added a Split Toning adjustment to the dog and a Exposure adjustment to add a vignette to finish it off.

#beforeandafter #photoediting #affinityphoto
After editing in Affinity Photo.

Before editing in Affinity Photo.


Sunday, July 5, 2020

Update: July 5, 2020

YES, I am still alive! Sorry that I have not posted in months, it has been a crazy year. Started the year with news of being laid off...they still have not laid me off...for now. I guess that is one good thing. Then this whole pandemic thing, but we stayed open as we are a print shop and printing is considered important to the economy. So while others were laid off, I was still working.

But let's talk about my photography. Hate to say it but I really just have not gotten back into it for various reasons. I mainly been concentrating on graphic design, etc. in prepping for a new job if I get laid off. This is why I been spending time over on Linkedin and watching YouTube videos to update some of my skills. Also, I been trying to be an advocate for Affinity applications like Affinity Photo, Affinity Publisher, and Affinity Designer. So, I kinda been out of the love for photography and just not getting out.

But I did get out on July 4th this year. Hit the local bike trail and took a few photos with my old iPhone 6s Plus and then did a little editing in Affinity Photo. You can a screenshot of me editing in Affinity Photo. I highly recommend it if you are looking for a replacement for Adobe Photoshop and tired of paying the subscription fee. There is a small learning curve but after 30 years working in Photoshop, if I can learn to use Affinity Photo, you can too.

I hope not to be this long to posting next time on the blog. Again, sorry for not posting.

You can find me on Linkedin:
https://www.linkedin.com/in/joefrazeeohio

#affinityphoto #photoediting

Editing photo using Affinity Photo.

Monday, December 30, 2019

Photo to Art: Mazza's

Last post for the year! Started this blog earlier in the year before Google shut down Google+. I decided I really did not want to move onto another social media platform and I definitely did not want to be on Facebook even though I have an account because of family.

But I wanted somewhere where I can show my photography and my creativity, as well as photo editing. I like playing around with editing; black and white, Instagram-like effects, painting, etc. I get bored if I keep doing the same thing over and over.

So I hope everyone has a Happy New Year and hope next year will be better. And I leave you with my latest creation that I did with a combination of Corel Painter and Affinity Photo.

#photoart #art #corelpainter #affinityphoto
FINAL ART (done in Affinity Photo)
SKETCH (done in Corel Painter)

ORIGINAL PHOTO

Saturday, November 30, 2019

Remembering Paul Walker

Being a big fan of the Fast & Furious films, November 30 is always a sad for FF fans like myself. On November 30, 2013, actor Paul Walker died in a fiery car crash. He was the original Fast & Furious character in the films and major character in the films (not including FF3). When read about him, he comes as a guy who was kind and cared about others. He doesn't come off as a big famous snobby actor but someone who is down to earth. So as a remembrance of Paul Walker, I create a image to post to social media using only Affinity Photo.

EDITING
After finding a photo of Paul behind the steering wheel from a scene from one of the films, I placed it into a 1080 x 1080 pixels document. Next, I added a Hue/Saturation adjustment layer and desaturated the image to take out the color to give me a black and white image to work with. I added a Black and White adjustment layer to adjust only his eyes to bring out some of the contrast. Next came a black rectangle at the bottom of the image and applied a gradient to fade the black rectangle. This is where I placed the text using the font Antique Olive Std Nord Italic which I was able to find on the internet (luckily for free). I needed to add some contrast to the image so I added a Brightness/Contrast adjustment layer and a Shadows/Highlights adjustment layer to darken the shadows. Then I used the Inpainting Brush Tool to remove some parts of the image where his cheeks meet the steering wheel. A Lens Filter adjustment was used to add a little bit of color to his face to finally finish off the image.

So, there is the finish work!

#photoediting #affinityphoto #paulwalker #fastandfurious

FINAL IMAGE 
WORKING IN AFFINITY PHOTO


ORIGINAL IMAGE I STARTED WITH